Sunday, 18 March 2018

Crafting with Brittany: DIY Leprachaun Figurine

Hi Everyone!


I hope you are enjoyed St. Patrick's Day this year! First, I just wanted to apologize for not having this post up yesterday. I got really sick last weekend and was not able to do very much. Today, I am feeling a bit better than I have all week so I figured I would try and get this post done so I could publish it and get it out to you all! Like the title suggests, I am bringing you a St. Patrick's Day DIY. I saw this little guy on Pinterest and thought he was so cute! It can definitely be done on a budget but it is a bit of a time-consuming project so make sure you set some time aside to do it. With that being said, let's get started!


Things You Need:
- green felt (adhesive felt and regular felt)
- long-hair fur material
- glue gun
- glue sticks
-scissors
- ribbon
-gold sparkle washi tape
- pop bottle (I used a glass pop bottle)

Step 1:
Take the adhesive felt and attach it to the pop bottle. I made the felt go all the way up the bottle but you do not have to do this. The hat covers the neck of the bottle so it only needs to go to where the neck of the bottle starts.

Step 2:
This is the part that is tedious. First you want to cut a rectangular piece of felt large enough to fit over the neck of the bottle so that it goes over the entire neck of the bottle. Sew the two shorter ends together. 

Step 3:
Next, cut out a circle a little bigger than the circle that the cylinder you made above is. Then, sew the edge of the circle to the edge of one end of the cylinder. This creates the top of the hat. 

Step 4:
Finally, cut out a bigger circle. I used the bottle of the bottle as a guide. Cut it out and then cut a smaller circle inside the circle (you create a green donut... hahaha). I made the inside circle an inch in from the outer circle. This makes the rim of the hat. Put the cylinder inside the smaller circle, line up the edges and then sew the edge of the rim to the bottom edge of the cylinder. Flip it right side out and you have a hat for your leprechaun. 

Step 5:
Plug your glue gun in and wait for it to warm up. While you are doing that take your fur fabric and determine how long/short you want the leprechaun's beard to be... and where you want it to start on either side. (NOTE: Be sure to put the hat on your leprechaun so that you can make sure the hat covers the sides). When the glue gun is ready, glue the fur fabric where you want it. 

Step 6 (Optional): 
If you have one, you can glue a peach coloured pom-pom to the top of the fur fabric, right under the hat, so that your leprechaun has a nose. I didn't want to buy a big package of pom-poms just for this project so I opted not to put a nose. 

Step 7: 
The last step is to glue the ribbon and the little gold buckle to the hat. First, put a dot of hot glue in the middle if the ribbon and press down to the front and centre base of the hat. Do be careful not to burn yourself. Next take one end and wrap around to the back centre of the hat. Place a dot of glue and press the ribbon down onto the hat. Do the same for the ribbon on the other side. Next take a tiny bit of glue and glue the gold square down to the front and centre of the hat on top of the black ribbon. This is your gold buckle. 

Step 8 (Optional): 
If you want to, you can glue a 4-leaf clover into the ribbon on one side of the hat, like I did. Just put some glue on the back of the clover and place where you want it on the hat. 

So that is everything! I hope you all enjoy making this as much as I did. I thought it turned out so cute! He looked so adorable sitting amongst all my other St. Patrick's Day decor. I hope you had a great St. Patty's Day! Thanks so much for stopping by and until next time, Happy Crafting! xo

Monday, 26 February 2018

Crafting with Brittany: Sweetheart Tree DIY


Hi Everyone!

I hope you are having a wonderful weekend. So with this being the month of love, I felt inspired to do a Valentine's Day DIY, but nothing that was incredibly sappy. I was looking for something that could stay up in my home year round, should I wish it to. So after perusing Pinterest for awhile, I came across a canvas art project... it was some birch trees with a neutral background and on one of the trees was an painted etched-heart with two initials in it. I thought this was so sweet and could easily be left up year round, so I decided to attempt it. It has the potential to be on the pricier side of things, but if you use coupons and stuff you already own, you could definitely make it budget-friendly. Let's get into it, shall we?

Things You Need:

- Paintbrush
- Paint (neutral colour or stain if using a wood canvas, white and black)
- Canvas or Wood (I used a coupon at Michaels for a 20X20 inch wrapped canvas)


Step 1:
Paint your canvas with the background colour of your choice. I used the colour zinc grey as my house is pretty much grey in every room. Let this dry. You may need to do a second coat.

Step 2:
Paint on the birch trees or whatever type of tree you are planning on painting. Let this dry.

Step 3:
Take the black paint and use tiny amounts to make the heart shape etching in the tree. Then use a smaller brush, if needed, to make the initial carvings inside the heart. Let this dry.

Step 4: (Optional)
Take a sealant spray and spray the entire canvas evenly. Let this dry. Once dry, you can hang it wherever you like.

So that is it! I hope you all enjoyed this tutorial on how to do this. Be sure to let me know in the comments below if you attempt this DIY - I love seeing people's different takes on things. Thank you so much for stopping by and until next time, Happy Crafting! xo

Saturday, 27 January 2018

Crafting with Brittany: DIY Christmas Key Chain

Hello Everyone!

I hope you all have been having a fabulous week. Here in Ontario we had some pretty crazy weather at the beginning of the week. Hence, why today when I am writing this, I am curled up on my bed, in track pants and a sweater with some candles lit. I'm real exciting, aren't I? Anyway, as the title suggests, in this post, I am telling you how I made a keychain. This keychain was time consuming, but only because I had so much stuff included and it took me a bit to figure out how to attach some of the stuff. I wouldn't exactly call it budget-friendly either. You will be looking at spending some money - especially if you don't have any of the supplies already. All of the stuff is sold at Michaels, however, you may be able to find it in places such as Dollar Tree, Dollarama and independent craft stores.

Things You Need:
-key chain ring
-link rings
-pliers (if you have ones specifically for jewelry making, USE THEM!!!)
-beads
-various charm embellishments (bells, monogram letter, snowflakes, word plates etc)
-wire pieces (to thread the beads onto to create little bead charms - I'm not sure what these are actually called - but you can buy them at Michaels)

Step 1:
Take your key chain ring and your link rings and attach them together. Keep adding link rings until you have the length you desire.

Step 2:
Next, I took my embellishments and roughly placed them out where I wanted them to go. Play around with this until you are absolutely satisfied. Once you are satisfied, you can start adding them on using the link rings. Once you have finished putting on all the embellishments, put the keychain to one side to work on making the bead embellishments.

Step 3:
Take your beads, your wire pieces for the beads and your pliers and start making your little bead embellishments. For mine, I just stuck a large green bead on the wire and then stuck a small red one on top. I, then, took my pliers and bent the wire and twisted it around itself on top of the red bead. Repeat this step until you have as many as you would like on your key chain.

Step 4:
Once you have made all your bead embellishments, cut off any excess wire using little wire cutters (nail clippers also works - you will have to bend the wire while holding it with the nail clippers).

Step 5:
Finally, add these bead embellishments on the key ring links wherever you would like. Be sure to close the links up tight so they don't come off.

And there you have it! You're very own key chain. I love how well this turned out, despite it being the first time I am making a keychain. I hope you all liked reading about this DIY. If you attempt to do this DIY and you document it on Youtube or on your blog, be sure to let me know, so I can check yours out. Be sure to follow this blog as I will be posting every other week. Also check out my Youtube Channel where I will occasionally be posting DIYs there as well. Thank you so much for stopping by and until next time, Happy Crafting! xo


Tuesday, 16 January 2018

Crafting with Brittany: DIY Dishwasher Sign

Hi Everyone!

Hope you all are having a wonderful start to 2018! Our year started off kinda rough but things are looking up now. So as the title says, today I am showing you how I made a little sign for our dishwasher to update the one I made years ago. It was super easy and budget friendly, but a bit time-consuming. This is definitely a way to streamline your life so that you always know if your dishes are clean or dirty in your dishwasher. So let's get started!

Things You Will Need:
- scrabble tiles
- piece of cardboard
- scissors
- cement glue
- magnets

Step 1:
Glue the scrabble tiles using the cement glue to the small piece of cardboard. Be sure to arrange them so that when you flip it either way it is readable. Let it dry for at least a few hours

Step 2:
Cut any excess cardboard off and throw it away. Take a couple magnets and glue them on the back using the cement glue. Let this dry for awhile.

Step 3:
Put it on your dishwasher door and enjoy!

So that is it! I hope you enjoyed reading this post. If you make this little DIY, be sure to let me know in the comments below, linking to your video or blog post. I would love to see how you put your own twist on this. Thank you so much for stopping by and until next time, Happy Crafting! xo


Wednesday, 15 November 2017

Deck the Halls with Brittany: DIY Rustic Advent Calendar

Hi Everyone!

So I am trying to get back into blogging regularly and am very exciting to be starting back at it with a Christmasy post. As the title suggests, I decided to tackle making my own advent calendar since I couldn't find one in stores that I really liked. And I'm going to share with you all how I've done it! This project is going to take a couple times - as there is a bunch of waiting involved! Let's get started, shall we?

Things You Will Need:
-wooden advent calendar (I got mine at Deserres for $40)
-stain or paint
-paint brush
-metal numbers (Tim Holtz @ Michaels)
-crazy glue
-items to put in the shadow box part (mini treasures aisle @ Michaels)
-sandpaper

Step 1:
 The first thing you will need to do is to sand the wooden advent calendar. It may have splinters and stuff so it will be good to sand these down so you don't injure yourself down the road. You will want to sand each individual box as well. After you have sanded everything, wipe down everything with a clean cloth.

Step 2:
  Next, take the stain and the paintbrush and stain the entire advent calendar. You might need to do this in stages. I took all the boxes out and did the large wooden box first. While I let that dry, I did the fronts and sides of each box. Then when everything was dry, I put the boxes back in. Once I figured out where they all went, I painted the inside of each little box and put it back in its square to dry. Leave this overnight.

Step 3:
  Once everything is dry, you can take your crazy glue and your metal number and glue them on. In what order you glue them is up to you. I opted to put them on each box randomly instead of in numerical order. Make sure you don't use a lot of glue and be careful when handling the metal numbers - you don't want to accidentally glue your fingers together. Let this dry overnight (just to be on the safe side)

Step 4:
   Finally, take your items you bought for the middle of the advent calendar and glue them in the middle square part. Wait for those to dry and the enjoy!!!

So that is it guys! It's pretty easy other than the length of time this DIY takes. I love the way this turned out. My decor for Christmas tends to be Rustic and I'm glad that it really turned out rustic and goes so well with my decor. I hope you all enjoyed this post! Send me a link or comment down below with a picture if you decide to tackle this project! Thank you so much for stopping by. Be sure to come back for more posts - I plan on doing a few more DIYs this Holiday Season! Until next time, Happy Holiday Crafting! xo

Sunday, 27 November 2016

Deck The Halls with Brittany: DIY Christmas Carol Canvas

Hey Everyone!

Hope you are enjoying your weekend so far! I sure am. I have just started watching the new Gilmore Girls episodes... and so far so good! Well, as you can see I am starting my “Deck the Halls with Brittany” series again for the holidays! This series will be on both of my blogs and my Youtube channel, so be sure to check them all out! Not all the content will be the same! With this being said, I am bringing you my first Holiday DIY of the year! I made a Christmas Carols Subway Art Canvas.
Things You Will Need:
  • canvas
  • paint
  • paint brush
  • alphabet stamps
  • sealant spray
  • markers in colours of your paint

Step 1:
Choose your first Christmas Carol and collect the stamps you will need for it. Then take the paintbrush and evenly coat each letter one at a time. Press the stamp down onto the canvas, one at a time until you finish the first carol. 

Step 2:
Repeat this process swapping out the paint colours. You want to make a pattern. For me, it was red, grey, dark grey, red, grey, dark grey etc. Repeat this until you have completed the entire canvas. 

Step 3:
Set the canvas some place in your home where it won't be disturbed while it is drying. 
Step 4: (** I had to use marker over my paint because it didn't come out as opaque as I would've liked)
Once it is dry, you can go over it with the markers and then spray it with a sealant spray so that the paint is protected and so is the canvas itself.  Once the sealant has dried, hang it in your house and enjoy! 

And that is all! Wasn't that easy? It is a bit time consuming, but totally worth it! I hope that you all enjoyed this little DIY holiday project! Be sure to show me pictures of your canvas - I would love to see them! Also, be sure to subscribe to this blog, The Britt Report (Lifestyle/Everyday blog) and my Youtube Channel (Queen Bree) as I have a lot of Holiday content coming up! Thank you so much for stopping by! Until next time, Merry Christmas and Happy Holidays! xo


Monday, 31 October 2016

Happy Fall Y'all: DIY Harry Potter Tee

Hi Everybody!

Hope you are having a good October so far! I'm bringing you another DIY and I hope all you Harry Potter fans out there especially enjoy it! It is a Harry Potter book title tee. This project is somewhat easy, yet time consuming so make sure you have at least an hour. It can be a bit pricy if you don't have the supplies.... for me, everything costed about $12, because I already had the stamps. Let's get started!

Things You Need:
- plain tee shirt (in a colour you will be able to see the lettering in)
- fabric paint (I went with black)
- stamps
- painter's tape
- wipes (to clean off the stamps)
- a piece of cardboard for the shirt

Step 1:
Carefully, mark where you want the words to go. I put the shirt on and marked where I wanted the words to start with the painter's tape. Take the shirt off (if you did what I did) and finish marking the two sides and the bottom with the tape.

Step 2:
Next, take the stamps and lay them out on your shirt so you get an idea of where you want the first word to go.

Step 3:
Once you are happy with it, take the piece of cardboard and put it between the front and back of the tee. This will protect the back of the shirt from any paint seeping through. After that, take your fabric paint and pour some out onto something you don't mind throwing out after. I used an extra piece of cardboard.

Step 4:
With a paintbrush, generously put an even amount of paint onto your stamp. Then make sure it is lined up and straight before you press it down onto the tee. Continue this process until you have completed all the words.

Step 5:
Once you have completed all the words, put it somewhere it can either lay flat or hang to dry. After it has dried, follow the instructions on the fabric paint bottle before you wear it. I had to wash mine after 72 hours inside out before wearing.

And you are done!!! That is all there is to it! I hope that you enjoyed this little tutorial on making your own Harry Potter tee. I am so happy with how mine turned out. Be sure to let me know if you do this DIY... I would love to see your versions of this DIY. Thank you so much for stopping by! This community means the world to me! Until next time, Happy Crafting! xo

Happy Fall Y'all: DIY Hello Fall Canvas Art

Hi Everyone!

I hope everyone is doing well on this lovely but somewhat chilly Thanksgiving Saturday. I am looking forward to spending the day with lovely company and eating a ton of yummy foods! Anyway, I just wanted to share with you a DIY project that turned out rather well. It doesn't cost too much and isn't too time consuming! Here is what you will need...

- a canvas (in your preferred size)
- faux fall leaves
- hot glue gun
- hot glue gun sticks
- paint
- paintbrush
-gold marker

Step 1:
Take your canvas, your paint and paint brush and paint the entire canvas. I chose black because it makes everything pop but you can choose whatever colour you want. Set the canvas aside to dry.

Step 2:
Once the canvas is dry, take your leaves and place them on the canvas until you are satisfied with how it looks. This is to give you a rough idea of how everything will look when completed.

Step 3:
Next, take your glue gun and start gluing the leaves to the canvas. Be sure to be careful, as the glue might seep through the faux leaves and can burn you.

Step 4:
Once you are done gluing, unplug your glue gun and then take your gold marker and write out whatever Autumn phrase you chose onto the canvas, where you want it to go. If it is easier, you can use a pencil first and a ruler. You can tweak it if needed.

And that is it! Be sure to hang it where you can admire it. It is an easy project that is really hard to mess up. I hope you all enjoyed this tutorial. Be sure to come back for more. I apologize for things being crazy.... I am going through a period of transition so I am hoping that it will start to get back to normal so I can post more regularly. Thanks again for stopping by and until next time, Happy Crafting! xo


Wednesday, 19 October 2016

Happy Fall Y'all: DIY Thanksgiving Canvas

Happy Fall Everyone!

I hope you all are enjoying this fine day! I am bringing you a late DIY post. I meant to have this posted on October 1 (last Saturday) but I got really busy and didn't have time to sit down and write. I will have some time tonight so I will make sure that this Saturday's post gets written! Anyway, today I am showing you how to make the cutest little canvas sign as part of your Thanksgiving decor. It is super easy but time consuming. I do apologize as I do not have any pictures of myself making this but I did have a video but I had to take it off Youtube due to copyright issues. I was listening to music while doing the DIY and my microphone on my phone picked up the sound. Let's get started, shall we?

Materials:

- Paint
- Paintbrush
- Canvas
- Sharpie type marker (in the colour of your choice)
- Washi or some other type of embellishment
- Alphabet stickers

Step 1:
Take your paint and paintbrush and apply a first coat to the canvas in the paint colour of your choice. You will need to set this aside to dry so make sure you have a space. Like I might have mentioned in the video, you make need to do a second coat, depending on the colour and type of paint.

Step 2:
Once the canvas is dry, take your alphabet stickers and carefully stick them to the canvas. Be sure to use a sticker that is sticky, but not so sticky that it will damage the canvas, take the paint off or just ruin the whole thing in general.

Step 3:
Once you have gotten the alphabet stickers on, take the Sharpie marker (or a similar marker) and trace around each letter. If it is easier, you can do a word at a time like I did in the video.

Step 4:
Next remove the stickers from the canvas very carefully. You may want to use some tweezer if you have them handy. I found this helpful when I was removing the stickers off my canvas.

Step 5:
Once you have all the alphabet stickers removed, take that same marker you used to trace around the stickers and fill in each of the letters until you have filled in all the letters of each word.

Step 6:
For the final step, take your washi or your embellishment or whatever you chose and stick it to wherever you think it would look nice. I just took some leaves washi tape I got at Michaels in a big pack and ran it across the bottom just to give it a slight border. I also did my lettering on different levels instead of just straight across. Once you have adhered the embellishment or washi to the canvas, you are done. You have completed your little Thanksgiving canvas for your home decor!

Well everyone, that was it! I hope that you enjoyed this little tutorial for this simple little Thanksgiving DIY! I sure enjoyed making it. Be sure to show me in the comments if you attempt to make this little DIY. I hope you all have a pleasant day! Thanks so much for stopping by my blog. Be sure to return as there will be many more posts coming in the future. Until next time, Happy Crafting.... and Happy Thanksgiving!!! xo

Friday, 30 September 2016

It's Fall Y'all: DIY Plaid Fall Coasters

Hi Everyone!

I hope you are all enjoying this cloudy Fall Friday lunch hour! I thought it was about time I brought you all a new DIY. I have been busy doing a bunch of DIY-ing so be prepare for some more Fall/Halloween stuff coming soon!

So in this DIY project, we are going to be Plaid Coasters for Fall. I saw this idea on Pinterest and thought it was the cutest thing, so naturally I had to attempt this for myself. The project is relatively easy but time consuming so be sure to set aside some time and perhaps binge-watch your favourite show on Netflix at the same time! I will also have a Youtube video of me making this DIY so if you are more of a visual person, then look below for my link to my channel.

The things you will need:
- Plaid Material
- Felt (doesn't matter what colour as you won't see it)
- Sewing thread
- Sewing Needle
- Scissors
- Pins

** If you don't have thread or a sewing needle, you can substitute those two items for a hot glue gun and glue sticks.

Step 1:
Cut the plaid material into squares approximately 4.5 inches by 4.5. Remember that you want to have a little bit of space to be able to sew or glue the two pieces together, but you want it to be big enough to fit the glass or mug on it.

Step 2:
Once all of your plaid material is cut into squares, do the same thing with the felt, cutting it a bit smaller. Don't worry if it doesn't fit at this moment or you cut it too big, you can always trim it down later.

Step 3:
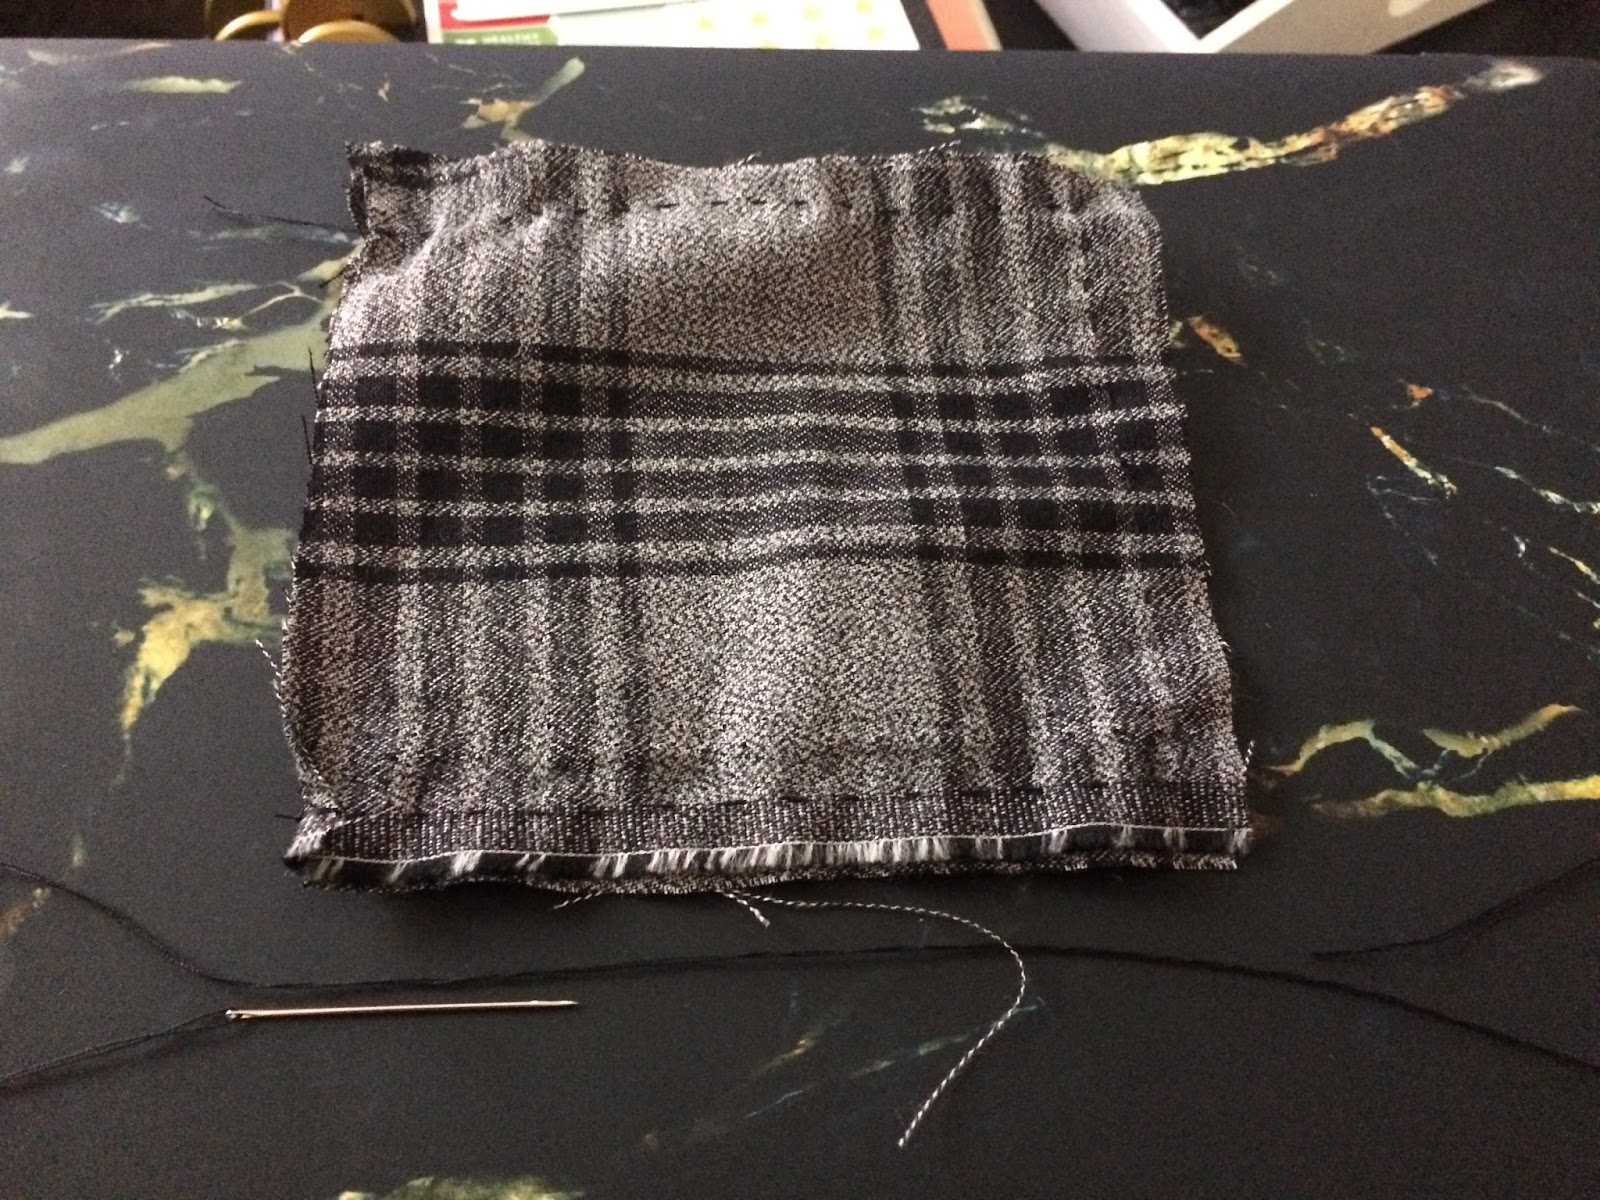
Take your two plaid squares and pin them together (if you need to). Be sure to leave one side open so you can turn it right side out. Then begin to sew (or glue) them together. Do this until you have secured three sides. Then cut the string, leaving enough to tie it. Once you have tied it off, you can cut the little tail and turn it right side out.

Step 4:
Take your piece of felt and put it inside the little pocket you have made. If you need to trim it, do so now. Once you have it inside, fold the two open pieces down inside the pocket. Pin them together so that you have shut the square completely. Then sew the opening shut, using a criss-cross pattern on the inside of the two flaps. ** If you are gluing instead of sewing, this part can be tricky so I would suggest pinning it together and then one by one taking the pins out and gluing on section at a time.

Step 5:
Once you have finished sewing the flap shut, tie it off. Once you have tied it off, cut the little tail off and you are done. You have a beautiful plaid Fall coaster. Continue this however many times you want until you have the desired number of coasters.

Anyways, that is all there is to it! Like I said, it is time consuming but not necessarily hard. So grab your supplies, your computer and turn on Netflix and get crafting! I hope that you guys enjoyed this tutorial. Look below if you would rather watch my Youtube video on how to make these awesome coasters! Thank you all for coming to check out this blog post and until next time, Happy Crafting! xo


Happy Fall Y'all: DIY Autumn Coasters Video:
https://www.youtube.com/watch?v=01ZahViFKB8
My Youtube Channel:
https://www.youtube.com/channel/UC4HLUixems2ln2CfNguupjQ
The Britt Report Blog:
http://brittreport.blogspot.ca/

Tuesday, 8 September 2015

Back 2 School Cool: Spruce Up Those Boring No.2 Pencils!!!

Hey Everyone!!!

Here is the second post to my Back 2 School Cool series. Below you will see the corresponding Youtube video should you prefer to watch my DIY tutorial instead of read about it. Be sure to like and subscribe so you don't miss out on more awesome DIY projects coming up! Today's tutorial is an update of a previous post I published last August or September. We are sprucing up our boring, old pencils in time for the school year. It is a super cheap and easy project to do! Let's talk about what you will need!

Things You Need:
-pencils
-washi tape (make sure its the paper tape and not the more sticker-ish tape)
-scissors

THAT'S IT!!! LET'S GET STARTED!!!!

Step 1:
Take your preferred washi tape and your pencil. Lay the pencil horizontally and unravel some washi tape next to it. Go from the bottom of the metal eraser holder to the end of the pencil. Cut the washi tape.

Step 2:
Slowly smooth the washi tape onto the pencil. I find that doing one of the flat surfaces first and then the next and then the next is easiest. Turn the pencil over and repeat Step 1 and Step 2.

Step 3:
Once you have completed wrapping the pencil, you can now sharpen it and use your snazzy new pencil. Using the paper washi should make sharpening the pencil possible. Using the sticker-ish washi doesn't work so well and makes the whole thing look like a disaster (Yes, I am speaking from experience!)


Wasn't that easy!?!?! I hope that you enjoyed this updated post and the video to go along with it. Be sure to like and subscribe to my channel if that is what you prefer. I would love to have you in my Youtube family. If you are more of a reader, that follow me on Google Plus. I'd love to have you in my Google Plus Family as well! Be sure to leave me comments either here or on Youtube showing me your creations. I'd love to see them! Until next time, xoxo!


Wednesday, 29 July 2015

Planner Decor on a Budget: DIY Ribbon Page Flag {Updated}

Hey Everyone!

So since deciding to start a Youtube channel, I decided I would update this post, as I wasn't happy with the outcome of the original post. I felt like I had a hard time trying to convey what the steps were and I forgot to take pictures of each step..... So this time, I've filmed it for you to give you a visual aid of the DIY process for this project.

This project is very simple and not expensive at all. Most dollar stores sell some pretty ribbon and you can find cheap ribbon at places like Walmart and Micheals (check the $1.50 section at Micheals). Paper clips can be found just about anywhere. I got these gold ones at Staples for about $2.50. This project definitely won't break your bank and the end result is a really nice page flag or bookmark! Let's get started!!!

Things You Need:
-paper clips (in the colour of your choice)
-ribbon (in the colour, sizes and patterns of your choice)
-scissors

Step 1:
Choose the ribbon and the paper clip you want to use. With the ribbon,you want to take it out of the package and determine which ribbons you want to group together.

Step 2:
Once you have determined which ribbons you want to use, take it and measure out about 5-6 inches of ribbon. Take the scissors and cut it and then put the rest of that ribbon to the side. Do this for however many pieces of ribbon you are using. Don't worry if the ribbons aren't all the same length... you can trim the ends later!

Step 3:
Next, take the ribbons you cut and place them carefully on top of one another. This will be tricky if the ribbons are bent like mine were. Then take the two ends and put them together.

Step 4:
Take the loop of the ribbons and put it through the solo loop of the paper clip (Please see my video below if you are confused). Don't pull the loop all the way through. Once you have gotten through the centres of all your strings and bring them all through the loop you've made, making sure that you have wrapped the ends around the paper clip while sliding them through the loop made in the ribbons (Again, see the video if you are confused). Pull the ends tight. You may need to do this with each individual ribbon end.

Step 5:
Finally, trim the ends so they are all the same length. Discard the pieces you just cut off in the trash.

That's it! Wasn't that easy!!?? I hope that you guys enjoyed this post and the video linked below. If you want to see more videos like this, be sure to like and subscribe to my Youtube Channel.There will be lots more videos coming up, both DIY and Lifestyle related! Stay Tuned and until next time, Happy Crafting! xoxo

Wednesday, 15 July 2015

Big Announcement!!!

Hi Guys!!!

I hope you all are enjoying this cooler, sunny weather on this wonderful Wednesday! Today, I just wanted to come on here and tell you my big announcement! Are you ready?

I now have a....... YOUTUBE CHANNEL!

I will still be blogging, but I will also be attaching my videos to the blogs. I have posted the link below!

I started a Youtube Channel because I was finding it hard to get my point across in regards to whatever I was talking about in my post. I was finding it especially difficult in my DIY blog. I kept feeling like I was going to confuse all of your readers because I myself would get confused when reading back what I wrote. With the encouragement of family and friends, I decided to take a leap. I want to share with you all the things I know, my opinions, cool things I find and everything in between. I hope that you enjoy the Youtube channel as much as the blogs. And remember I will still post on here, with or without video content so be sure to come back and check the blogs out.

With much love,

Brittany
https://www.youtube.com/channel/UC4HLUixems2ln2CfNguupjQ

Summer Fun: DIY Door Wreath for Canada Day!

Hi Everyone!

I'm back with a DIY home decor post. I know Canada Day has passed, but I figured I would post this anyway. Its a fairly easy project that doesn't take too long to make. Let's get started, shall we?

Things You Need:
-round, styrofoam wreath
-burlap
-Canada Day garland
-Canada Day bow
-Glue gun
-Glue sticks

Step 1:
Take the styrofoam wreath and the glue gun and use it to wrap the burlap around the wreath.Do this quickly because the glue will dry fast.

Step 2:
Next, glue the Canada Day garland around the top of the wreath. See the picture to the right.

Step 3:
Next, glue the bow to the bottom of the wreath. There was a twist tie but I couldn't get it to stay very well. Gluing it worked way better.

Step 4:
Finally, hang the wreath at your front door or wherever you are going to hang it.

I hope you enjoyed this little DIY project for Canada Day. I'm sorry it came too late for Canada Day but perhaps you can use it for next year. If you do end up making it, please let me know by commenting in the comment box below. Until next time, Happy Crafting! xo


Monday, 8 June 2015

Planner Decor on a Budget: DIY Tassel Accessories!

Hi Everyone!

Sorry I've been gone for so long. If you haven't been following my other blog, I have been pretty MIA the past couple of months. I spent a lot of the first month sick and May was pretty hectic because the hubby and I were in the middle of moving. I'm hoping that come July things will have settled back down and I will be back to posting twice a week. I still have to finish re-vamping The Crafty Canadian! Oh my! Anyway, I thought I would just pop on and bring you a quick little tutorial for you fellow planner people out there! I have become obsessed with decorating my planner and since we have bought a house, looking for cheap ways to get the same kinda products you can buy in the store.

This week's tutorial is a DIY Tassel! They are fairly simple, yet a tad time consuming. Let's get started, shall we?

Things You Need:
-scissors
-thin wire (in your colour choice, I went with gold)
-embroidery thread
-paper clip (optional)

Step 1:
Take your embroidery string and remove the little paper pieces. You want to find an end and cut off two pieces of string about 5 inches long. The length of the one string will depend on how far you want the tassel to fall. Try to do this without unravelling the wound string.

Step 2:
Once you have cut the pieces you need, take the string and without unravelling it, create a circle so that it looks as if you have wound the string around your hands. Once you have made the circle, take the piece of string you want for the handle of the tassel. Put the two loose ends together and knot them. Take the knotted end and put it through the circle. Take the loop end of your knotted string and loop it through the knotted end. Pull tightly and your handle of the tassel should be secure.

Step 3:
Take the other piece of string and tie it around the circle of string (See picture). Cut off the excess pieces. Then cut the bottom of the circle. You may need to trim it so that it is all even.

Step 4:
Once you have completed the trimming, take your thin wire and cut a piece off. Carefully, wrap the wire around the place where you tied that second string. This is to hide that string. It is also optional.

Step 5 (Optional):
If you are attaching this to a paper clip, just take your paper clip and take the string that is the handle of the tassel. Slide the loop of the string around the paper clip until you get it to where you feel it is secure.

That's it!!! You have made your very own tassel accessory. I have actually made a bunch of these. I made them for each of my different sketchbooks and I made one for the planner I am currently using. I hope that you enjoyed this little tutorial. If you decide to make this, be sure to leave me a comment below letting me know so I can go and check it out! Until next time, Happy Crafting! xoxo

Wednesday, 6 May 2015

DIY Harry Potter Ipad Mini case {Picture to come}

Hi Everyone!

I hope you all are enjoying this wonderful Monday! The weather here in Ottawa was lovely, hence why I am posting late this evening instead of towards the beginning of the day. Today, I am bringing you a little project I found posted on Pinterest. It is a felt Harry Potter Ipad cover. Now, the post I found on Pinterest was a link to an Etsy store. Money is a tad tight right now and so instead of ordering one from this Etsy store, I decided I could probably make my own. It was way cheaper than the price I had found at the Etsy store... but it is fairly time-consuming and not a project that kids could do by themselves. With that said, let's talk about what you will need!

Things You Need:
-scissors
-sewing kit
-hot glue
-hot glue gun
-felt in white (2), black, red and yellow
-paper
-pencil

Step 1:
Start by measuring how big the white felt needs to be in order for the iPad to fit inside. I made mine a bit bigger as I don't like when it is too snug.

Step 2:
Cut the white felt. Take your sewing kit and using the white thread and a needle, sew the the edges of the felt together.

Step 3:
Next, take your piece of paper and pencil and make stencils for the eyeglasses and the hair. I found these two to be the hardest. You could probably print out templates if you wanted to spend the time searching for some.

Step 4:
Once you have the stencils made, pin them to the black felt and carefully cut along the edges of the templates. Set aside.

Step 5:
Take your red felt and cut out three squares and a lightening bolt shape. The squares will be a part of his scarf.

Step 6:
Take the yellow felt and cut a strip the same width as the red squares you cut moments ago. Make sure it is the same length as the bottom of the white felt.

Step 7:
Plug your glue gun in. Once hot, carefully glue each piece of felt onto to the white felt. I found that if you leave your iPad inside the white case you made it was easier to do. Or stick a piece of cardboard in it if you are worried about your iPad. Make sure to use a fair amount of glue. You don't want anything coming off.

Once you have finished gluing, you are done! Wasn't that a fun project? I had so much fun making my little case for my iPad mini. It turned out so cute. If any of you decide to make this little DIY, be sure to leave me a comment below telling me about it. You can also leave me a picture or a link to your own posts so I can go and see them. Again, I hope you enjoyed! Until next time, Happy Crafting! xoxo

Monday, 13 April 2015

Planner Decor on a Budget: DIY Journal Card Inserts! {Late Post}

Hi Everyone!

I hope you all are enjoying your Friday. I am actually writing this from my bed on Thursday evening. I have been laid up in bed since Tuesday with some sort of flu or cold. It has sucked. Anyway, I thought I would bring you another post about some of the journaling decor I've made. Today, I'm going to show you how simple it is to make a journaling card that can be inserted into a spiral ring planner. All you need is a few supplies and a bit of patience! Let's get started!

Things You Need:
-hole punch
-journal card
-marker
-clear page flag (post-it)
-scissors

Step 1


Step 1:
Take the Post-It page flag and stick it to the back of the journal card. Make sure it is straight and lined up.


Step 2


Step 2:
Place it near the spiral rings to mark where you will be placing it. Once you are satisfied with the placement and it's not going to stick or get caught, mark the spiral rings on the page flag. Make the marks in the middle of the page flag.


Step 3


Step 3:
Take your hole puncher and put the marks you made with the marker in the middle of the circle. Punch out each mark you made. You may have to take the scissors and snip the last little bit off. I found that my hole punch couldn't cut through the page flag properly.


Step 4


Step 4:
Once you have punched all the holes, take the scissors and snip the little piece of page flag near the edge so you can push each ring into the hole. Insert it into your planner and Voila!!!! You have just made your own journal card insert.


There you have it! A simple and affordable way to insert journaling cards into your spiral planner. I hope that you enjoyed this little tutorial. I love making these little inserts with journaling cards I have lying around. Let me know in the comments below what other kind of planner DIYs you would like to see in the future! Until next time, Happy Planner Decorating!

Tuesday, 7 April 2015

How To Make A Menu Board That Is Affordable!!!

Hi Everyone! 

So I am writing this from my bed. I am currently not feeling very well but I'm trying to keep to my schedule so this is my attempt. So tonight, I am bringing you a Menu Board DIY. This is something that has really helped Jesse and I stay organized when grocery shopping and for planning meals. It's really easy and doesn't take a lot of time. It is actually not too expensive, even less so if you have all the items you need already. Let's get into it! 

Things You Need:
-scissors
-dry erase board
-washi tape
-chalkboard labels 
-chalkboard marker
-alphabet stickers


Step 1:
Take your dry erase board and your washi tape and start deciding where you want to put everything. I had a 8 spots for the days of the week (A place to write 'What's for Dinner?' and then a space for each Day of the Week). On the right side, I had a Notes Section and a Grocery List space. 

Step 2:
Cut strips of washi tape and place them on the dry erase board. The good thing about using washi tape is that it is easy to remove and re-place. You can move it multiple times and it will stick. Place washi tape until you have completed the template for your menu board.


Step 3:
Next, take your chalkboard labels and label the different areas (ie. Notes, Grocery List, Days of the Week). I also used some chalkboard labels to decorate the Days of the Week. 

Step 4:
Next take your chalkboard marker and write in what each section is. You can use the chalkboard marker to mark each day of the week or you can use some alphabet stickers like I did. I used black alphabet stickers so they don't show up in the pictures, but you can use whatever. Make it your own! 

And that's it! Your very own menu board! Like I said it can be pretty cheap if you already have the stuff. If not, be careful about spending too much. You don't want it to become an expensive project! I hope that you enjoyed this project tutorial! Be sure to leave me comments, pictures or links to your posts if you decide to tackle this project! I'd love to see what you all come up with. Until next time, Happy Crafting! xoxo

Monday, 6 April 2015

Spring Thaw with Brittany: DIY Easter Banner

Hi Everyone!

So I'm back today with another Easter DIY decor post. Today, we will be making a simple and affordable Easter banner. You won't need very many supplies and it isn't very time consuming. Let's get started!!!!

Things You Need:
-scissor (or a paper slicer)
-card stock
-printer (with colour ink)
-ribbon
-computer
-hole punch

Step 1:
So the first step will be to google printable banner ideas for easter. I actually found this one on Pinterest and the template was free to download. Once you have found one you like, save it to your computer.

Step 2:
Print it out. Then taking your scissors or paper slicer, cut each banner piece out. Once you have cut them out, take your hole punch and punch two holes at the top of each banner piece. NOTE: Be careful to not punch them too close to the edge. You don't want it to rip apart.

Step 3:
Once you have punch out the holes, take your ribbon and thread it through the holes until all of your banner pieces are on the ribbon. Knot each end so the banner won't come off.

And that's it! You have a simple and really cute Easter banner. You can hang it wherever you like. I hung mine above my TV with some white lights (To see this, be sure to come back from time to time to see my Spring/Easter Decor in the next week)! If you attempt to do this DIY, be sure to let me know in the comments below. You can leave me a pic or send me a link to your own posts. I love checking it out! Until next time, Happy Easter!

Monday, 30 March 2015

Spring Thaw with Brittany: DIY Glitter Easter Egg Picks for Flower Arrangements!

Hi Everyone!

I hope everyone is enjoying their Monday afternoon! I'm back with another post for those who are getting into Easter decorating. This is a simple and affordable project. It is also not all that time-comsuming. The most time spent is waiting for things to dry. Today, we will be making our own glitter eggs for flower or plant arrangements. I couldn't find any I liked in the Dollar Store so I figured I would make my own. Let's get into it!

Things You Need:
-scissors
-skewer sticks
-plastic eggs
-fine glitter
-white glue
-paint brush
-clear sealant spray (you can also use hairspray if you don't have sealant spray)

Step 1:
Cut the skewer sticks in half. I made 8 eggs so you will need four skewer sticks.

Step 2:
Stick the skewer stick into the hole at the bottom of the egg. Push it through to the whole in the top. Try to get it in the top hole but not so far that it sticks out noticeably.

Step 3:
Take your paintbrush and white school glue and cover the egg. Be sure to apply a generous amount (Because of the plastic the glue will separate and so not all of it will be covered in glitter).

Step 4:
Take the glitter and pour it all over the egg. Be sure to be turning the egg to get all of it covered. Put it aside. Repeat the last four steps with all your eggs.

Step 5:
Once you have completely glittered all the eggs, take your sealant (or hairspray) and coat it with a thin layer. Be sure to get all areas of the egg. Set aside and let them dry.

And there you have it! You have lovely glitter eggs to put in your flower or plant arrangements. You could hot glue little loops of string on them and hang them on your mantle from a string as well. You can really do a lot with these little guys. Well, I hope you enjoyed this post! Let me know if you tackled this project by leaving me comments, pictures or links to your posts in the comments box below. I love hearing from you guys! Until next time, Happy Easter! xoxo