Friday, 10 October 2014

What Should I Do With An Old Picture Frame?

Hi Everyone!

So I am playing catchup for this week, so I'm back again with another DIY post. This is another easy and cheap project. A while back I was sitting here with a picture frame I had used for something in my wedding and I really wanted to keep it because it looked nice and vintage. However, the little prop on the back was nearly broken off. I wondered what I could do with it. Then I remembered something I had seen on Pinterest to hold little pictures. So that is what I made.

This DIY is so cheap and so easy. It took me about an hour to an hour and a half. I didn't spend any money because I already had everything I needed in my craft room. If you do need these materials, Michaels and Dollarama are good places to look for supplies.

So if you are ready, let's get started!

The Things You Need:
-old picture frame
-twine
-mini clothes pins
-glue gun
-glue gun glue sticks
-spray paint (optional)

Step 1:
Take the frame apart. Discard the back and the glass.

Step 2:
Put newspaper down in the area you are going to spray paint the frame (this is optional. I didn't like the colour of my frame so I spray painted!).

Step 3:
Once you are prepped for spray painting, set your frame down and put on the first coat. Let that dry (This could take anywhere from 15 minutes to 1 hour, depending on the type of spray paint you use).
Repeat this step as many times as you need. The paint can be as opaque or sheer as you like. It's completely up to you.

Step 4:
Once you are happy and the paint is dry, bring it back to your work space and plug in your glue gun. Wait for it to get hot.

Step 5:
Once hot, glue one end of the twine to the back of the frame. Then drape the twine to the opposite side and glue it down with the hot glue gun. Cut off the excess twine. Repeat this step as many times as you want. I only did it twice because my frame is small.

Step 6:
Once the glue has dried, attach the mini clothes pins and you are done. Instead of an old picture frame, you now have a newer, more modern version on a picture frame and a nice new decor piece for your home. I hope that you enjoyed this DIY. Definitely let me know if you want to see more home decor DIYs. Also, if you make your own version of this, be sure to send me a picture in the comments or attach a link so I can view them on a different social media site! Have fun and Happy Crafting! xoxo

Thursday, 9 October 2014

I LOVE FALL DIY: Leaf Candle Holder

Hi Everyone!

Sorry I haven't posted in a while. I've been busy trying to play catch-up and actually get some stuff done so that I will have stuff to post on here. Anyway, I'm back with a quick, easy, and cheap DIY home decor item for Autumn. Let's get started!

What you will Need:
-candle jar that has been cleaned out
-glue gun
-glue sticks
-fake leaves (I got mine at Dollar Tree)
-twine

Step 1:
Open the package of leaves and determine how big they are. Start laying out how you want it to look when glued around the glass candle jar. Do this while you are waiting for the glue gun to get hot (Oh ya, remember to plug in the glue gun!)

Step 2:
Once your glue gun is ready and you have decided about the placement of the leaves. Start gluing the leaves to the jar. You will want to do this part as fast as possible because the glue dries and hardens fairly quickly. Glue leaves all around the jar. You can put as little or as many as you like.

Step 3: Once you have glued leaves all around the jar, take your twine and cut enough twine so you can wrap it around the jar more than twice. I wrapped it around three times on mine! Once you have knotted it and then tied a bow, you are done! Now you have a cute little Autumn candle holder! Wasn't that easy?!?!

I hope that you enjoyed this simple and cheap tutorial. As you can tell, I only spent about 2 bucks on the leaves because I had everything else at home. If you make your own version of this, I would love to see it, so be sure to leave me a picture of it in the comments or leave me a link where I can view it on another site! Happy Crafting! xoxo

Friday, 3 October 2014

I LOVE FALL: DIY Framed Subway Art!

Hi Guys!

So I'm coming on here today, with another DIY Autumn decor project. This one is super simple and cheap to do. Let's get started!

Things you Need:
-scissors
-computer
-printer
-frame (I got mine from the Dollar Store)

Step 1:
Go online and find pictures of Autumn and/or Thanksgiving Subway Art. When you find one that you like, save the picture to your computer.

Step 2:
Open it from where you saved it on your computer. Copy it onto a Word document. Resize it based on the measurements of your frame. You want it to fit the whole picture frame. Print it out!

Step 3:
Let it dry a little and then cut it out. Open the frame up and fit the picture into the frame. Put everything back into the frame and close it up.

And there you have it! Your own subway art. You can do this for every holiday, just by doing the exact same thing! I plan to switch mine at Halloween and for Christmas! I also made one that was a Fall Bucket List, using these steps. Happy Crafting! xoxo


I Love Fall: DIY Canvas Subway Art

Hi Everyone!

It's Brittany and I'm back with another Autumn Decor DIY! I'm so excited to share this one with you. I started this project last Thanksgiving but ran out of time to finish it and so this year, I figured I would finish it and show you guys. This one is really time consuming so definitely start this one early. Let's get started!

Things you need:
-canvas
-sharpie markers
-pencil
-eraser
-computer (optional)
-spray sealant

Step 1:
Take your pencil and eraser and lightly plan out what you want your canvas to look like. Really make sure to do it lightly so that you can erase things if needed. You might need to look up different fonts on your computer.

Step 2:
Next, take the Sharpie marker in the colour you have chosen for your background and colour in the background. This is where things are going to get time consuming. Colour in the background. Be sure to go around all of your lettering.

Step 3:
Once the background is completely coloured in and you are happy with it, take the colour you have chosen for the different fonts and start colouring the words in. This is another time consuming portion, but if you make a mistake it is okay. You will be able to go back and fix things up.

Step 4:
Next, take the other colours you chose in colour in any pictures or fonts you decided were going to be coloured.

Step 5:
Go over the canvas and fix up any mistakes as best you can. Let it dry and then spray it with a sealant so it is protected from water. Let that dry and you are finished!

I hope you enjoyed this Fall DIY! I am so happy I finally got this done and can now enjoy it in my living room. Hope you have just as much fun making it as I did! Be sure to share them with me, by leaving a picture in the comments! Happy Crafting! xoxo

Thursday, 25 September 2014

I Love Fall: DIY Autumn Wreath!

Hi Everyone!

I am back with a fairly easy, yet time-consuming DIY project for Autumn. I love Autumn! It's my favourite time of year. I love the crispness of the fall air and the beautiful colours that come with the changing of the seasons. Today, I'm bringing you a DIY Autumn Wreath for your front door. Like I said, it is easy and fairly cheap but it is a bit time-consuming. Be sure you have the time... or start it and then come back to it later. Let's get started!

Things You Need:
-grapevine wreath
-fake autumn foliage
-scissors
-hot glue sticks
-hot glue gun
-ribbon
-wreath holder for the door
-wooden letter (optional)
-paint
-paintbrush

Step 1:
Cut the foliage so that it isn't in a big bunch. (This is how you buy it at the store). Once you have separated all the pieces, decide on the colours you want, which ones you want to use etc. (NOTE: make sure you leave a few inches of the stem on each piece - do NOT cut it right under the leaf or flower etc).

Step 2:
Carefully, start placing the foliage in between the vines of the wreath. You may have to really work it into some places. i struggled a bit with some of my pieces. But once they are in, they are in. (NOTE: I hot glued some of mine in that weren't staying between the vines).

Step 3:
Once you have all the foliage the way you want it (don't be afraid to get creative and play around with it), you can take your ribbon and cut off a considerable piece. I just made a simple bow and glued it in a spot I felt had a little less going on.

Step 4:
Next, paint your wooden letter in the colour that you desire, if you have decided to do this step. I had this wooden letter as a decorative piece on one of the tables at our wedding. I didn't know what else I was going to do with it so I glued it to this wreath. You will need a lot of glue for this part. I also recommend getting a slightly lighter wooden letter, as mine is heavy and the wreath becomes lopsided easily. Once the letter is dry, glue it to the wreath.

Step 5:
Let the glue you put on dry. Once it is ready, take your wreath door hanger (I got mine at Dollarama) and attached it to your front door (or wherever you plan to put this). Then put the wreath on the front of the door. And voila! You are finished a beautiful Autumn Wreath for your door.

I hope that you enjoyed this DIY post! I had an enjoyable time making this wreath. I might do one for Christmas as well. Other than the wooden letter, I bought all the materials for this project at the dollar store! If you do this project yourself, I would love to see them. Post them in the comments below! Happy Crafting!!! xoxo

Monday, 22 September 2014

I Love Fall: DIY Fall Arrangements!

Hi my crafty friends!

Hope you all are staying warm on this chilly day! So today, I'm posting about a DIY that I did for Fall over the weekend. It took about an hour to do both arrangements. It was fairly easy and budget friendly. Let's get started!

Things you will need:
-scissors
-vase
-rocks/sand/pebbles
-different fall flower and leaf bunches
-ribbon


Step 1: 
Cut all the flowers and leaves off the main stem. Be sure to leave a stem on the actual flower that is about 3 or 4 inches long. If you can't, that is fine. Just make it as long as you can.

Step 2:
Take your vase and fill it with whatever filler you have chose. In one of my vases, I used gold rocks I had around the house and in the other, I used the pebbles that you put in a fish aquarium. I had leftovers from when I made my centrepieces for my wedding reception.

Step 3:
Next wrap the ribbon around the outside the vase. This step is optional. You don't need to wrap ribbon around the vase.

Step 4:
Now, start putting your fall foliage into the vase. Play with it until you get it how you want it. Once you are happy with it, you are done!

Wasn't that easy? I made two in an hour and a half. Remember that there is no bad looking arrangement. It's up to you and what you like. Get creative with it! I hope my first Fall DIY was enjoyable! I'm going to be doing more in the next month or so, so be sure to check back periodically! Happy Crafting! xoxo

Wednesday, 17 September 2014

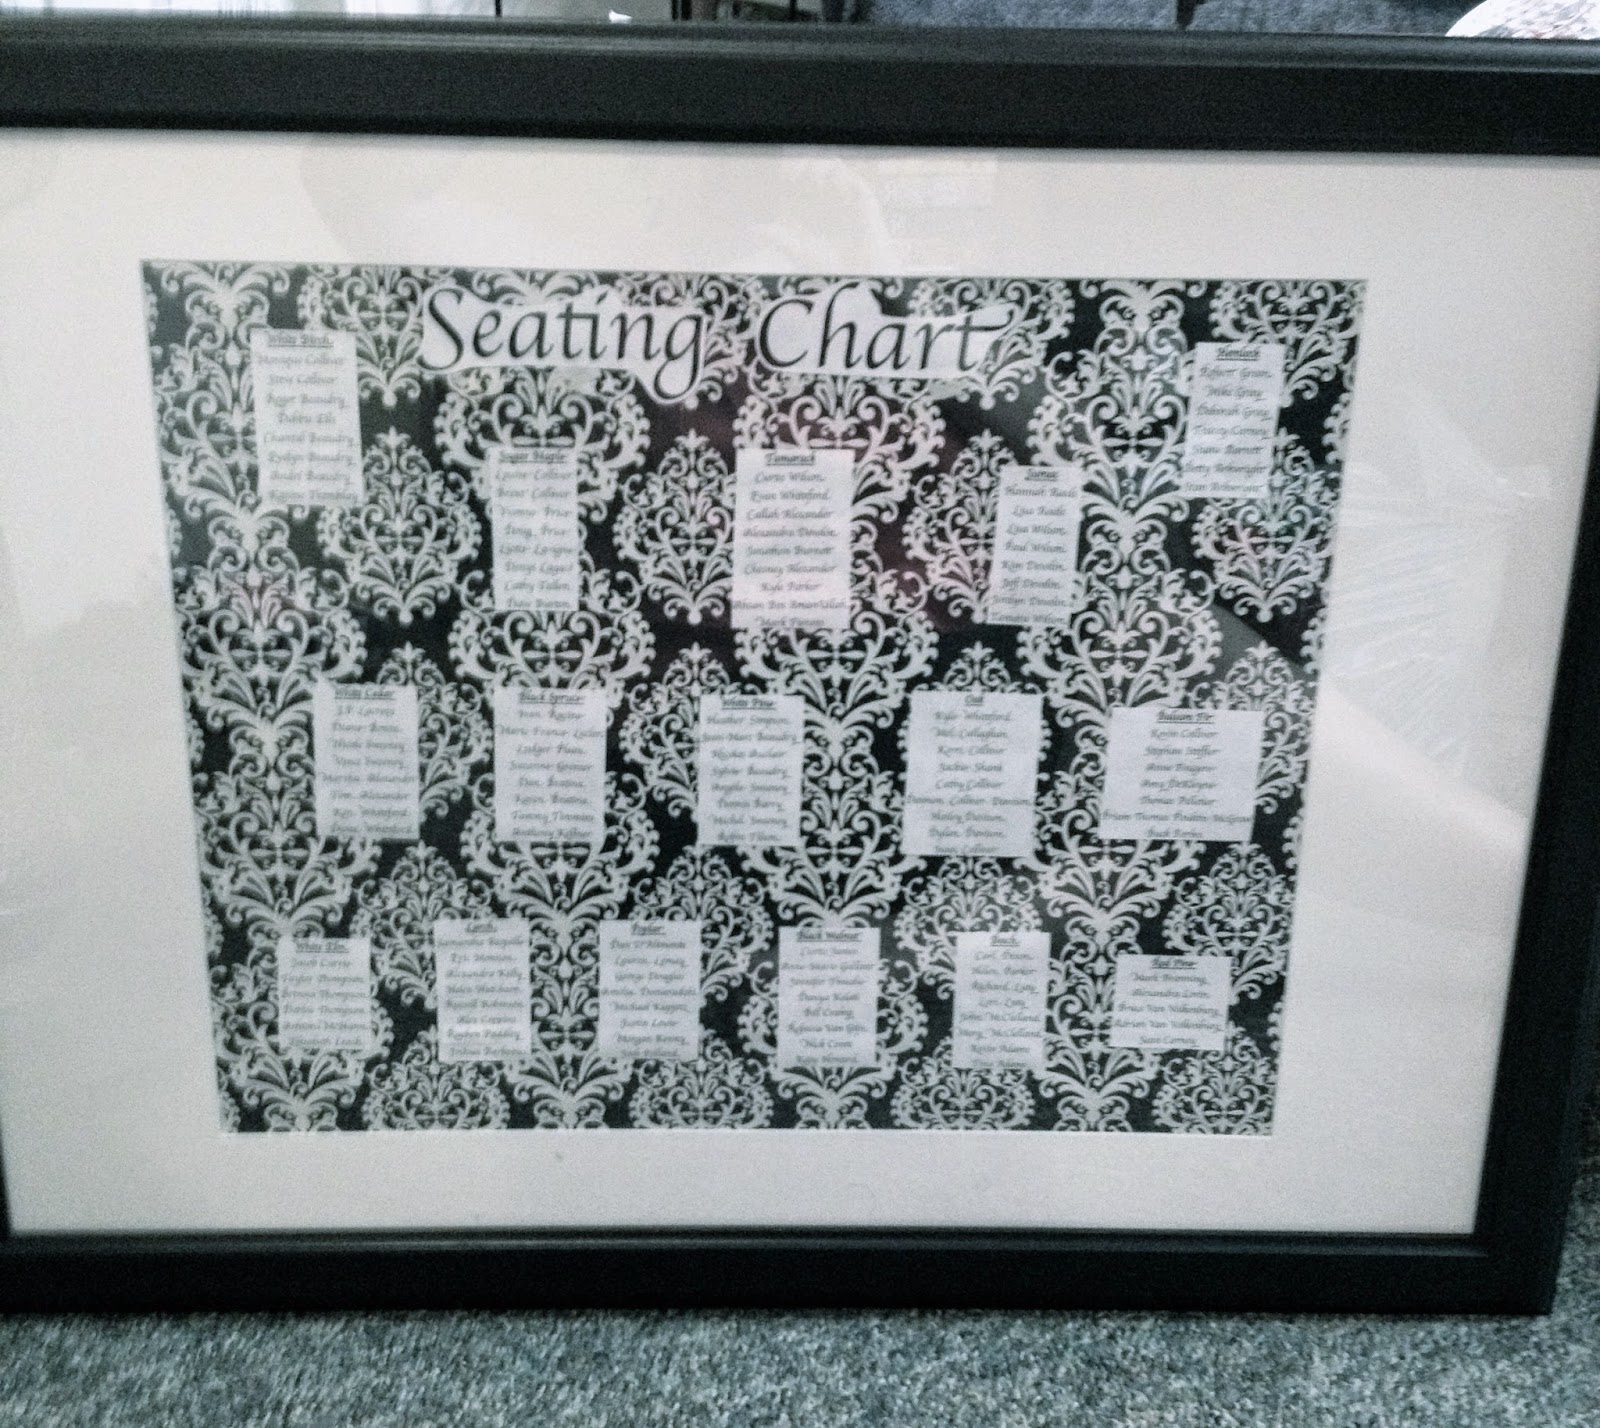
Wedding DIY: Easy Seating Chart!

Hey Everyone!

Hope you all are having a great Wednesday afternoon! Today, I've got an easy DIY for those of you who are getting married! As you all may know, I got married a few months back so I thought I would share with you how I made my seating chart for the reception. You will only need a few things, it's that easy! Let's get started!

Things You Need:
-Picture frame
-Wrapping paper
-White Computer paper
-Computer/Laptop
-Printer
-Scissors
-Tape or Glue Stick

Step 1:
Buy a picture frame. I bought mine at Ikea for $20 (I think, I can't remember). Also buy some wrapping paper in your wedding colours. I found this at Michael's in the $1.50 bins.

Step 2:
Take the back off the frame. Take the fake picture out and use this as a guide for how big to make the wrapping paper background. I attached the fake picture that comes in the frame to my wrapping paper. Cut off the excess.

Step 3:
Next, take your computer/laptop and open a Microsoft Office (or the equivalent - I used Libre Office) and make your page landscape. Then format the page so that there is three columns. I chose a font similar to Brush Script and I centred everything. You will need to play around with until you get it exactly how you want it.

Step 4:
Once you have got it how you want it, print the page(s) out and cut them out as straight as you can. Then tape or paste them down. I found the easiest way to make sure it ended up centred in your frame was to take the border out of the frame and set it on top of wall paper. This allows you to see the area you have to work with. If you are doing a "Seating Chart" title, be sure to leave some space.

Step 5:
Once you have everything where you want it and glued down, go back to your computer and using the same font, type the words Seating Chart. Print it out and then cut it out. Glue it down in the space that you left. Put the border back in the frame. Then the wrapping paper and then the back of the frame. Once it is all back together, you are finished!

And there you have it! Pretty Simple eh? I hope you have enjoyed this Wedding DIY. If you are interested in other Wedding DIY's, be sure to check out my other Wedding DIY posts. And be sure to go over to The Britt Report to see more of my daily life and what I've been up to lately! Happy Crafting! xoxo