Showing posts with label Home Decor DIY. Show all posts

Sunday, 18 March 2018

Crafting with Brittany: DIY Leprachaun Figurine

Hi Everyone!


I hope you are enjoyed St. Patrick's Day this year! First, I just wanted to apologize for not having this post up yesterday. I got really sick last weekend and was not able to do very much. Today, I am feeling a bit better than I have all week so I figured I would try and get this post done so I could publish it and get it out to you all! Like the title suggests, I am bringing you a St. Patrick's Day DIY. I saw this little guy on Pinterest and thought he was so cute! It can definitely be done on a budget but it is a bit of a time-consuming project so make sure you set some time aside to do it. With that being said, let's get started!


Things You Need:
- green felt (adhesive felt and regular felt)
- long-hair fur material
- glue gun
- glue sticks
-scissors
- ribbon
-gold sparkle washi tape
- pop bottle (I used a glass pop bottle)

Step 1:
Take the adhesive felt and attach it to the pop bottle. I made the felt go all the way up the bottle but you do not have to do this. The hat covers the neck of the bottle so it only needs to go to where the neck of the bottle starts.

Step 2:
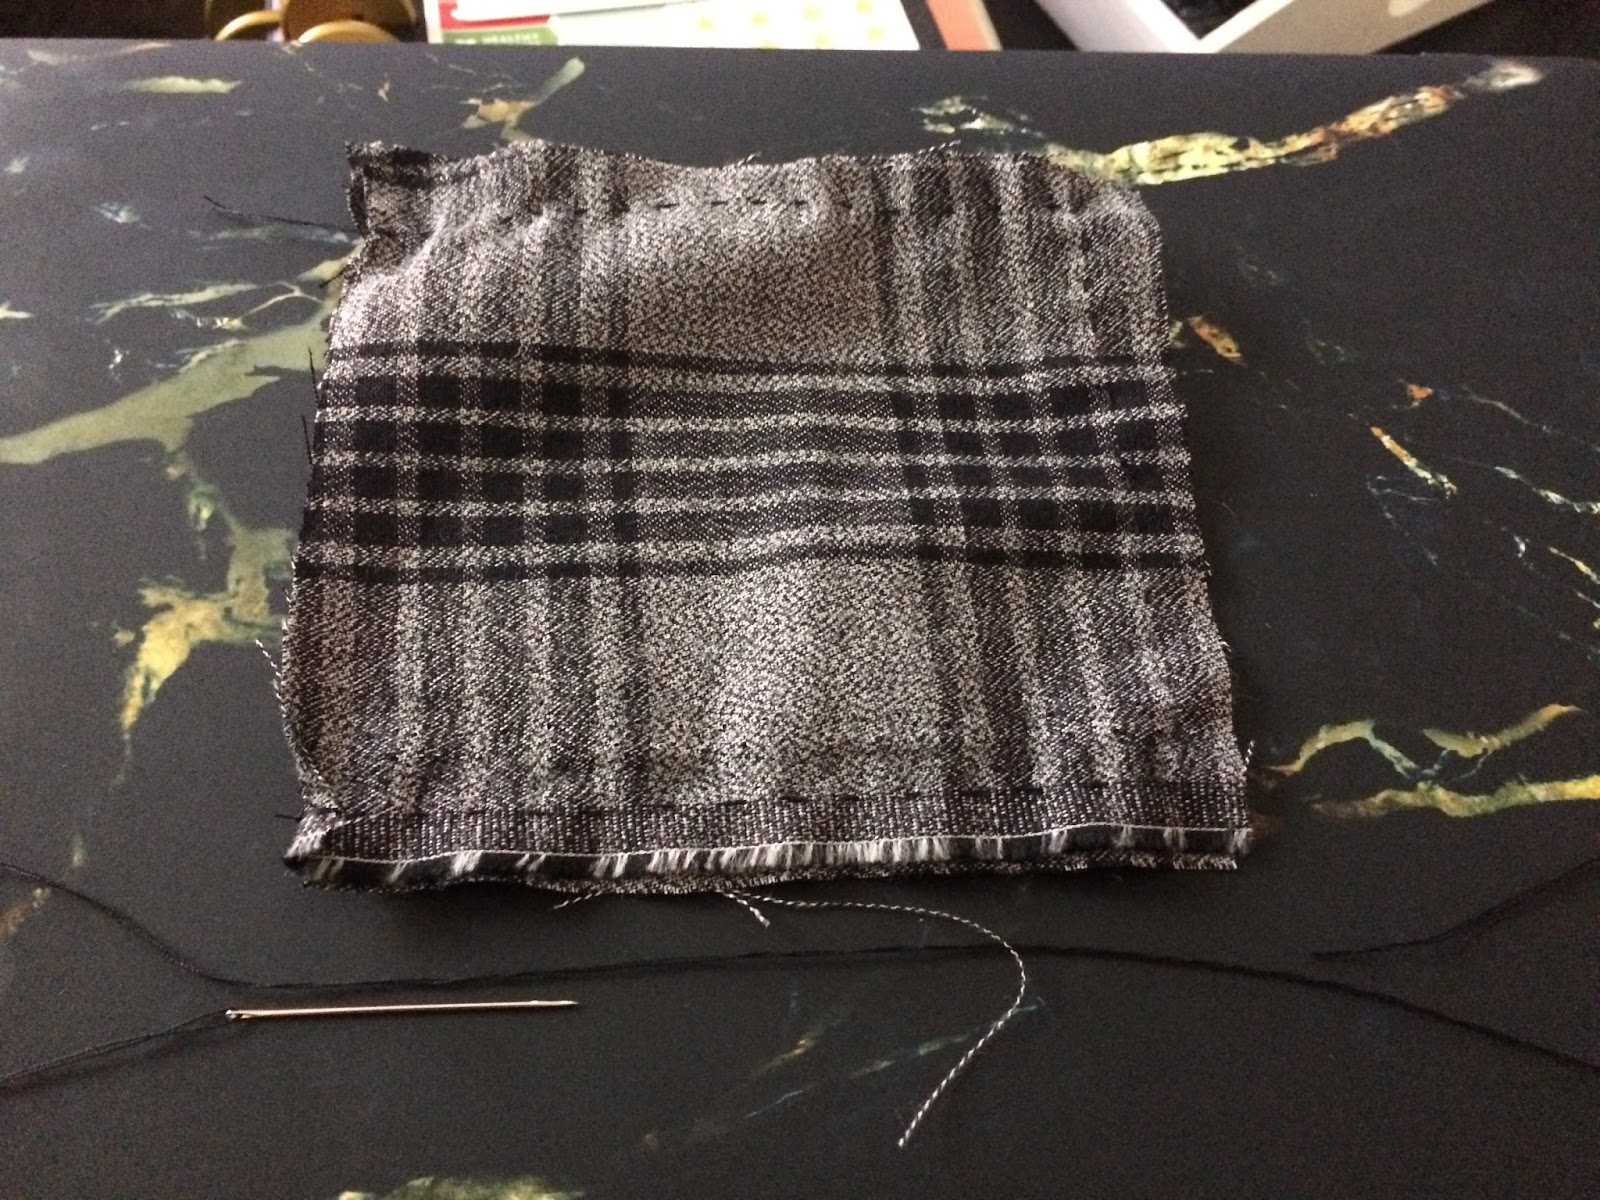
This is the part that is tedious. First you want to cut a rectangular piece of felt large enough to fit over the neck of the bottle so that it goes over the entire neck of the bottle. Sew the two shorter ends together. 

Step 3:
Next, cut out a circle a little bigger than the circle that the cylinder you made above is. Then, sew the edge of the circle to the edge of one end of the cylinder. This creates the top of the hat. 

Step 4:
Finally, cut out a bigger circle. I used the bottle of the bottle as a guide. Cut it out and then cut a smaller circle inside the circle (you create a green donut... hahaha). I made the inside circle an inch in from the outer circle. This makes the rim of the hat. Put the cylinder inside the smaller circle, line up the edges and then sew the edge of the rim to the bottom edge of the cylinder. Flip it right side out and you have a hat for your leprechaun. 

Step 5:
Plug your glue gun in and wait for it to warm up. While you are doing that take your fur fabric and determine how long/short you want the leprechaun's beard to be... and where you want it to start on either side. (NOTE: Be sure to put the hat on your leprechaun so that you can make sure the hat covers the sides). When the glue gun is ready, glue the fur fabric where you want it. 

Step 6 (Optional): 
If you have one, you can glue a peach coloured pom-pom to the top of the fur fabric, right under the hat, so that your leprechaun has a nose. I didn't want to buy a big package of pom-poms just for this project so I opted not to put a nose. 

Step 7: 
The last step is to glue the ribbon and the little gold buckle to the hat. First, put a dot of hot glue in the middle if the ribbon and press down to the front and centre base of the hat. Do be careful not to burn yourself. Next take one end and wrap around to the back centre of the hat. Place a dot of glue and press the ribbon down onto the hat. Do the same for the ribbon on the other side. Next take a tiny bit of glue and glue the gold square down to the front and centre of the hat on top of the black ribbon. This is your gold buckle. 

Step 8 (Optional): 
If you want to, you can glue a 4-leaf clover into the ribbon on one side of the hat, like I did. Just put some glue on the back of the clover and place where you want it on the hat. 

So that is everything! I hope you all enjoy making this as much as I did. I thought it turned out so cute! He looked so adorable sitting amongst all my other St. Patrick's Day decor. I hope you had a great St. Patty's Day! Thanks so much for stopping by and until next time, Happy Crafting! xo

Monday, 26 February 2018

Crafting with Brittany: Sweetheart Tree DIY


Hi Everyone!

I hope you are having a wonderful weekend. So with this being the month of love, I felt inspired to do a Valentine's Day DIY, but nothing that was incredibly sappy. I was looking for something that could stay up in my home year round, should I wish it to. So after perusing Pinterest for awhile, I came across a canvas art project... it was some birch trees with a neutral background and on one of the trees was an painted etched-heart with two initials in it. I thought this was so sweet and could easily be left up year round, so I decided to attempt it. It has the potential to be on the pricier side of things, but if you use coupons and stuff you already own, you could definitely make it budget-friendly. Let's get into it, shall we?

Things You Need:

- Paintbrush
- Paint (neutral colour or stain if using a wood canvas, white and black)
- Canvas or Wood (I used a coupon at Michaels for a 20X20 inch wrapped canvas)


Step 1:
Paint your canvas with the background colour of your choice. I used the colour zinc grey as my house is pretty much grey in every room. Let this dry. You may need to do a second coat.

Step 2:
Paint on the birch trees or whatever type of tree you are planning on painting. Let this dry.

Step 3:
Take the black paint and use tiny amounts to make the heart shape etching in the tree. Then use a smaller brush, if needed, to make the initial carvings inside the heart. Let this dry.

Step 4: (Optional)
Take a sealant spray and spray the entire canvas evenly. Let this dry. Once dry, you can hang it wherever you like.

So that is it! I hope you all enjoyed this tutorial on how to do this. Be sure to let me know in the comments below if you attempt this DIY - I love seeing people's different takes on things. Thank you so much for stopping by and until next time, Happy Crafting! xo

Tuesday, 16 January 2018

Crafting with Brittany: DIY Dishwasher Sign

Hi Everyone!

Hope you all are having a wonderful start to 2018! Our year started off kinda rough but things are looking up now. So as the title says, today I am showing you how I made a little sign for our dishwasher to update the one I made years ago. It was super easy and budget friendly, but a bit time-consuming. This is definitely a way to streamline your life so that you always know if your dishes are clean or dirty in your dishwasher. So let's get started!

Things You Will Need:
- scrabble tiles
- piece of cardboard
- scissors
- cement glue
- magnets

Step 1:
Glue the scrabble tiles using the cement glue to the small piece of cardboard. Be sure to arrange them so that when you flip it either way it is readable. Let it dry for at least a few hours

Step 2:
Cut any excess cardboard off and throw it away. Take a couple magnets and glue them on the back using the cement glue. Let this dry for awhile.

Step 3:
Put it on your dishwasher door and enjoy!

So that is it! I hope you enjoyed reading this post. If you make this little DIY, be sure to let me know in the comments below, linking to your video or blog post. I would love to see how you put your own twist on this. Thank you so much for stopping by and until next time, Happy Crafting! xo


Sunday, 27 November 2016

Deck The Halls with Brittany: DIY Christmas Carol Canvas

Hey Everyone!

Hope you are enjoying your weekend so far! I sure am. I have just started watching the new Gilmore Girls episodes... and so far so good! Well, as you can see I am starting my “Deck the Halls with Brittany” series again for the holidays! This series will be on both of my blogs and my Youtube channel, so be sure to check them all out! Not all the content will be the same! With this being said, I am bringing you my first Holiday DIY of the year! I made a Christmas Carols Subway Art Canvas.
Things You Will Need:
  • canvas
  • paint
  • paint brush
  • alphabet stamps
  • sealant spray
  • markers in colours of your paint

Step 1:
Choose your first Christmas Carol and collect the stamps you will need for it. Then take the paintbrush and evenly coat each letter one at a time. Press the stamp down onto the canvas, one at a time until you finish the first carol. 

Step 2:
Repeat this process swapping out the paint colours. You want to make a pattern. For me, it was red, grey, dark grey, red, grey, dark grey etc. Repeat this until you have completed the entire canvas. 

Step 3:
Set the canvas some place in your home where it won't be disturbed while it is drying. 
Step 4: (** I had to use marker over my paint because it didn't come out as opaque as I would've liked)
Once it is dry, you can go over it with the markers and then spray it with a sealant spray so that the paint is protected and so is the canvas itself.  Once the sealant has dried, hang it in your house and enjoy! 

And that is all! Wasn't that easy? It is a bit time consuming, but totally worth it! I hope that you all enjoyed this little DIY holiday project! Be sure to show me pictures of your canvas - I would love to see them! Also, be sure to subscribe to this blog, The Britt Report (Lifestyle/Everyday blog) and my Youtube Channel (Queen Bree) as I have a lot of Holiday content coming up! Thank you so much for stopping by! Until next time, Merry Christmas and Happy Holidays! xo


Monday, 31 October 2016

Happy Fall Y'all: DIY Hello Fall Canvas Art

Hi Everyone!

I hope everyone is doing well on this lovely but somewhat chilly Thanksgiving Saturday. I am looking forward to spending the day with lovely company and eating a ton of yummy foods! Anyway, I just wanted to share with you a DIY project that turned out rather well. It doesn't cost too much and isn't too time consuming! Here is what you will need...

- a canvas (in your preferred size)
- faux fall leaves
- hot glue gun
- hot glue gun sticks
- paint
- paintbrush
-gold marker

Step 1:
Take your canvas, your paint and paint brush and paint the entire canvas. I chose black because it makes everything pop but you can choose whatever colour you want. Set the canvas aside to dry.

Step 2:
Once the canvas is dry, take your leaves and place them on the canvas until you are satisfied with how it looks. This is to give you a rough idea of how everything will look when completed.

Step 3:
Next, take your glue gun and start gluing the leaves to the canvas. Be sure to be careful, as the glue might seep through the faux leaves and can burn you.

Step 4:
Once you are done gluing, unplug your glue gun and then take your gold marker and write out whatever Autumn phrase you chose onto the canvas, where you want it to go. If it is easier, you can use a pencil first and a ruler. You can tweak it if needed.

And that is it! Be sure to hang it where you can admire it. It is an easy project that is really hard to mess up. I hope you all enjoyed this tutorial. Be sure to come back for more. I apologize for things being crazy.... I am going through a period of transition so I am hoping that it will start to get back to normal so I can post more regularly. Thanks again for stopping by and until next time, Happy Crafting! xo


Friday, 30 September 2016

It's Fall Y'all: DIY Plaid Fall Coasters

Hi Everyone!

I hope you are all enjoying this cloudy Fall Friday lunch hour! I thought it was about time I brought you all a new DIY. I have been busy doing a bunch of DIY-ing so be prepare for some more Fall/Halloween stuff coming soon!

So in this DIY project, we are going to be Plaid Coasters for Fall. I saw this idea on Pinterest and thought it was the cutest thing, so naturally I had to attempt this for myself. The project is relatively easy but time consuming so be sure to set aside some time and perhaps binge-watch your favourite show on Netflix at the same time! I will also have a Youtube video of me making this DIY so if you are more of a visual person, then look below for my link to my channel.

The things you will need:
- Plaid Material
- Felt (doesn't matter what colour as you won't see it)
- Sewing thread
- Sewing Needle
- Scissors
- Pins

** If you don't have thread or a sewing needle, you can substitute those two items for a hot glue gun and glue sticks.

Step 1:
Cut the plaid material into squares approximately 4.5 inches by 4.5. Remember that you want to have a little bit of space to be able to sew or glue the two pieces together, but you want it to be big enough to fit the glass or mug on it.

Step 2:
Once all of your plaid material is cut into squares, do the same thing with the felt, cutting it a bit smaller. Don't worry if it doesn't fit at this moment or you cut it too big, you can always trim it down later.

Step 3:
Take your two plaid squares and pin them together (if you need to). Be sure to leave one side open so you can turn it right side out. Then begin to sew (or glue) them together. Do this until you have secured three sides. Then cut the string, leaving enough to tie it. Once you have tied it off, you can cut the little tail and turn it right side out.

Step 4:
Take your piece of felt and put it inside the little pocket you have made. If you need to trim it, do so now. Once you have it inside, fold the two open pieces down inside the pocket. Pin them together so that you have shut the square completely. Then sew the opening shut, using a criss-cross pattern on the inside of the two flaps. ** If you are gluing instead of sewing, this part can be tricky so I would suggest pinning it together and then one by one taking the pins out and gluing on section at a time.

Step 5:
Once you have finished sewing the flap shut, tie it off. Once you have tied it off, cut the little tail off and you are done. You have a beautiful plaid Fall coaster. Continue this however many times you want until you have the desired number of coasters.

Anyways, that is all there is to it! Like I said, it is time consuming but not necessarily hard. So grab your supplies, your computer and turn on Netflix and get crafting! I hope that you guys enjoyed this tutorial. Look below if you would rather watch my Youtube video on how to make these awesome coasters! Thank you all for coming to check out this blog post and until next time, Happy Crafting! xo


Happy Fall Y'all: DIY Autumn Coasters Video:
https://www.youtube.com/watch?v=01ZahViFKB8
My Youtube Channel:
https://www.youtube.com/channel/UC4HLUixems2ln2CfNguupjQ
The Britt Report Blog:
http://brittreport.blogspot.ca/

Tuesday, 8 September 2015

Back 2 School Cool: Spruce Up Those Boring No.2 Pencils!!!

Hey Everyone!!!

Here is the second post to my Back 2 School Cool series. Below you will see the corresponding Youtube video should you prefer to watch my DIY tutorial instead of read about it. Be sure to like and subscribe so you don't miss out on more awesome DIY projects coming up! Today's tutorial is an update of a previous post I published last August or September. We are sprucing up our boring, old pencils in time for the school year. It is a super cheap and easy project to do! Let's talk about what you will need!

Things You Need:
-pencils
-washi tape (make sure its the paper tape and not the more sticker-ish tape)
-scissors

THAT'S IT!!! LET'S GET STARTED!!!!

Step 1:
Take your preferred washi tape and your pencil. Lay the pencil horizontally and unravel some washi tape next to it. Go from the bottom of the metal eraser holder to the end of the pencil. Cut the washi tape.

Step 2:
Slowly smooth the washi tape onto the pencil. I find that doing one of the flat surfaces first and then the next and then the next is easiest. Turn the pencil over and repeat Step 1 and Step 2.

Step 3:
Once you have completed wrapping the pencil, you can now sharpen it and use your snazzy new pencil. Using the paper washi should make sharpening the pencil possible. Using the sticker-ish washi doesn't work so well and makes the whole thing look like a disaster (Yes, I am speaking from experience!)


Wasn't that easy!?!?! I hope that you enjoyed this updated post and the video to go along with it. Be sure to like and subscribe to my channel if that is what you prefer. I would love to have you in my Youtube family. If you are more of a reader, that follow me on Google Plus. I'd love to have you in my Google Plus Family as well! Be sure to leave me comments either here or on Youtube showing me your creations. I'd love to see them! Until next time, xoxo!


Wednesday, 15 July 2015

Summer Fun: DIY Door Wreath for Canada Day!

Hi Everyone!

I'm back with a DIY home decor post. I know Canada Day has passed, but I figured I would post this anyway. Its a fairly easy project that doesn't take too long to make. Let's get started, shall we?

Things You Need:
-round, styrofoam wreath
-burlap
-Canada Day garland
-Canada Day bow
-Glue gun
-Glue sticks

Step 1:
Take the styrofoam wreath and the glue gun and use it to wrap the burlap around the wreath.Do this quickly because the glue will dry fast.

Step 2:
Next, glue the Canada Day garland around the top of the wreath. See the picture to the right.

Step 3:
Next, glue the bow to the bottom of the wreath. There was a twist tie but I couldn't get it to stay very well. Gluing it worked way better.

Step 4:
Finally, hang the wreath at your front door or wherever you are going to hang it.

I hope you enjoyed this little DIY project for Canada Day. I'm sorry it came too late for Canada Day but perhaps you can use it for next year. If you do end up making it, please let me know by commenting in the comment box below. Until next time, Happy Crafting! xo


Monday, 6 April 2015

Spring Thaw with Brittany: DIY Easter Banner

Hi Everyone!

So I'm back today with another Easter DIY decor post. Today, we will be making a simple and affordable Easter banner. You won't need very many supplies and it isn't very time consuming. Let's get started!!!!

Things You Need:
-scissor (or a paper slicer)
-card stock
-printer (with colour ink)
-ribbon
-computer
-hole punch

Step 1:
So the first step will be to google printable banner ideas for easter. I actually found this one on Pinterest and the template was free to download. Once you have found one you like, save it to your computer.

Step 2:
Print it out. Then taking your scissors or paper slicer, cut each banner piece out. Once you have cut them out, take your hole punch and punch two holes at the top of each banner piece. NOTE: Be careful to not punch them too close to the edge. You don't want it to rip apart.

Step 3:
Once you have punch out the holes, take your ribbon and thread it through the holes until all of your banner pieces are on the ribbon. Knot each end so the banner won't come off.

And that's it! You have a simple and really cute Easter banner. You can hang it wherever you like. I hung mine above my TV with some white lights (To see this, be sure to come back from time to time to see my Spring/Easter Decor in the next week)! If you attempt to do this DIY, be sure to let me know in the comments below. You can leave me a pic or send me a link to your own posts. I love checking it out! Until next time, Happy Easter!

Monday, 30 March 2015

Spring Thaw with Brittany: DIY Glitter Easter Egg Picks for Flower Arrangements!

Hi Everyone!

I hope everyone is enjoying their Monday afternoon! I'm back with another post for those who are getting into Easter decorating. This is a simple and affordable project. It is also not all that time-comsuming. The most time spent is waiting for things to dry. Today, we will be making our own glitter eggs for flower or plant arrangements. I couldn't find any I liked in the Dollar Store so I figured I would make my own. Let's get into it!

Things You Need:
-scissors
-skewer sticks
-plastic eggs
-fine glitter
-white glue
-paint brush
-clear sealant spray (you can also use hairspray if you don't have sealant spray)

Step 1:
Cut the skewer sticks in half. I made 8 eggs so you will need four skewer sticks.

Step 2:
Stick the skewer stick into the hole at the bottom of the egg. Push it through to the whole in the top. Try to get it in the top hole but not so far that it sticks out noticeably.

Step 3:
Take your paintbrush and white school glue and cover the egg. Be sure to apply a generous amount (Because of the plastic the glue will separate and so not all of it will be covered in glitter).

Step 4:
Take the glitter and pour it all over the egg. Be sure to be turning the egg to get all of it covered. Put it aside. Repeat the last four steps with all your eggs.

Step 5:
Once you have completely glittered all the eggs, take your sealant (or hairspray) and coat it with a thin layer. Be sure to get all areas of the egg. Set aside and let them dry.

And there you have it! You have lovely glitter eggs to put in your flower or plant arrangements. You could hot glue little loops of string on them and hang them on your mantle from a string as well. You can really do a lot with these little guys. Well, I hope you enjoyed this post! Let me know if you tackled this project by leaving me comments, pictures or links to your posts in the comments box below. I love hearing from you guys! Until next time, Happy Easter! xoxo

Friday, 27 March 2015

Spring Thaw with Brittany: DIY Easter/ Spring Wreath!

Hey Everyone!

So I'm back with another DIY post and with Spring having just arrived and Easter coming up fast, I figured I would start writing about some Easter and Spring DIYs.

This DIY will be an Easter/ Spring Wreath and is a pretty time consuming project. It has taken my awhile to finish and I've changed it and added to it because I wasn't happy with it. With that, let's talk about the things you will need for this project!

Things You Need:
-some sort of wreath (I used a gold ring that was similar in diameter to other door wreaths)
-scissors
-pencil
-chalk marker
-mini burlap banner pieces
-glitter foam sheet
-tulle in your preferred colour
-flower clips
-bird clip (optional)
-chalkboard clothes pin
-yarn or ribbon
-mini clothes pins
-butterfly clip (optional)
-velcro stickers
-fabric marker

Step 1:
Take your tulle and cut it to the size you want. Remember that you will be folding it in half and attaching it to the gold ring so make sure you double it when you figure out the length. I think I made mine about 3 inches (so 6 inches doubled). Cut about 50-100 pieces. It will depend on how big your gold ring is.

Step 2:
Take each piece of tulle and fold it in half, making a loop on the one side. Wrap it around the ring and pull the loose ends through the loop. Pull it tight to make sure it is secure to the ring. Do this until the entire ring is full and covered.

Step 3:
Once you are finished putting the tulle on, take your glitter foam and cut a bunny out of it. If you aren't so great at free-handing animals, you can always go on Google and search 'bunny silhouettes' like I did. If you do this option, trace it out on the back of the foam sheet and then cut it out. After you have cut it out, take some of the velcro stickers and put one on the back of the foam bunny and the other on the tulle where you want the bunny to sit.

Step 4:
Next, take all your flower clips (and your birds and butterflies if you opted for these clips as well) and arrange them on the wreath by clipping them on the tulle. I found you have to attach the clips to one or two pieces of tulle to make it more sturdy.

Step 5:
Next, take your chalkboard clothespin sign and your chalkboard marker and write 'Happy' on it. If you aren't good in the calligraphy area, you can always print something out or use alphabet stickers instead. Clip it to the wreath (make sure you figure out where you want to place the sign first, so that you write on the sign right side up!)

Step 6:
Finally, take the little burlap banner pieces and take a fabric marker and write the letter to spell out "Easter" on each of the pieces. Let it set for a few minutes. Then take the string and run it through the holes in each banner piece. Once everything is strung through, take your mini clothespins and attach either end to the wreath.


That's it! You have completed your very own Easter Wreath. What I like about this wreath is that I can take things off and use it again for another season or holiday. I used the wreath for St. Patrick's Day and just took everything off, packed it away and started from a (nearly) clean slate. Like I said, this wreath was rather time consuming, but is definitely more affordable than those wreaths you can find at places like Michaels. If any of you decide to make an Easter wreath, be sure to leave me a picture or a link to your own posts down below in the comments. I would love to see what you come up with! Until next time, Happy Easter! xoxo

Tuesday, 17 March 2015

St. Paddy's Day with Brittany: DIY Wreath for the Front Door.

Hello Everyone! 

Hope you all are having a fabulous St. Paddy's Day. I'm bringing you my last DIY post having to do with this Irish Celebration. This one is fairly simple and fairly cheap to do. It probably took me, like, an hour tops! Let's get started!!!

Things You Need:
-scissors
-velcro circles
-tulle
-metal ring
-foam shamrock 
-wire garland

Step 1:
Decide how long you want your tulle to extend out. Cut a lot of strips of tulle. I'm not sure how many I cut... I would say something like 50-75 strips. 

Step 2:
Once you have the strips cut, start tying them onto the metal ring. To do this, you need to fold the strip of tulle in half, forming a loop. With the strip still folded in half, put it around the metal wire. Then slip the two ends of the tulle through that loop that you made. Pull it tightly!

Step 3:
Next, do Step 2 until the entire metal ring has been covered. Once you have finished, fluff it out if it needs it. Place one side of the velcro on the tulle and press it down firmly. Press the other piece of the velcro pair to your foam shamrock. Place the foam shamrock on the wreath (I did this so I could reuse the wreath for Easter/Spring). 

Step 4:
Finally, take the wire garland and cut off a strip of it. Wrap one end around one side of the wire ring and then take the other end and do the same on the opposite end. Once it is secure, you are finished. One thing I will mention is to make sure you don't secure the garland too securely, if you are going to repurpose this into a Spring/Easter wreath! 

And that is how you make this simple and cute St. Patrick's Day Wreath! Wasn't that easy? I hope that you enjoyed this tutorial. If you make this yourself, be sure to leave me pictures or links so I can see your creativity! Until next time, Happy St. Patrick's Day!!! xoxo


Sunday, 15 March 2015

St. Paddy's Day with Brittany: DIY "Lucky" Banner

Hi Everyone!

Wow! Can you believe St. Patrick's Day is nearly here?!?!?! I sure can't! In the spirit of the month and the awesome holiday of St. Patrick's Day, I thought I would bring to you a DIY to help you, if you were thinking about decorating your house for the occasion. You will need to have some time to kill because it is a tad time-consuming. It is a fairly inexpensive project and it turned out really good!
Shall we get started?

Things You Need:
-scissors
-green card stock
-ribbon
-foam 4 leaf clovers
-alphabet stickers
-glue gun
-glue gun sticks
-hole puncher
-ruler
-pencil

Step 1:
Take your green card stock and divide it into four equal rectangles. Do this with the second piece of card stock as well. Cut out each rectangle.  You want to end up with 7 rectangles.

 Step 2:
Once the rectangles are all cut out, take a hole puncher and punch two holes in each rectangle. If you want, you can cut a triangle shape out of the bottom of the rectangle cards. This will change it to look more like a banner. To do this, I folded one of the cards in half, lengthwise, and cut on an angle starting at the outer corners. Unfold that first card and then use it to cut the rest of the cards by placing it on top of each of the other cards.


Step 3:
Plug in your glue gun. Once it is ready, start gluing your foam four-leaf clovers onto the card stock. Let them dry.


Step 4:
Once the foam four leaf clovers are all glued on the card stock, start putting the alphabet stickers on five of the four leaf clovers. I spelled the word LUCKY. I found these stickers weren't great for sticking on foam so I actually hot glued them onto the foam.
Using the ribbon you have chosen, string it through the holes you punched out earlier. Be sure to space them evenly apart.


And there you have it! You have made your very own St. Patrick's Day banner. I hope that you all enjoyed this post! If you decide to make a banner, be sure to leave me pictures or the link to your post in the comments below. I will be sure to check them out! Until next time, Happy St. Patrick's Day! xoxo

Tuesday, 10 March 2015

Crafting with Brittany: DIY Blanket Ladder

Hi Everyone! 

Hope you all are doing well today! Today I have an exciting DIY project for you. I am super excited to share this with you. I found it a month ago when I was browsing through Pinterest and having received a few throw blankets for Christmas this year. I also own a few already and they are really taking up a lot of valuable storage space in my linen closet. So why not display them in my living room? On a blanket ladder? So let's get into it shall we?

Things You Need:
-2x4 pieces of wood [x2] (I actually used long stakes for mine. It really is up to you and how thin or thick you would like it to be). 
-2x4 pieces of wood [x1-2] (These are to make the rungs of your ladder. I made six rungs but only needed 5 of them).
-wood screws
-power drill
-sand paper
-sander (if you have one).
-paint or stain (I used Miniwax PolyShades in Classic Black Satin)
-paintbrush
-saw
-pencil 


Step 1:
Take your pieces of wood and take the sander (or sandpaper) and sand down each piece. Make sure it is smooth. You don't want to get any slivers during the making of this beautiful home decor piece. 

Step 2:
Once everything is sanded, set aside the two pieces you are going to use as the rails. Then take the other one or two pieces of wood and measure how long you want each rung to be. This will depend on how wide or narrow you want the ladder to be. 

Step 3:
Once you have measured out and marked how long you want each rung, take your saw and cut on the lines. Once you have cut everything, sand the edges to smooth them out.

Step 4:
Next, take the two rails you set aside and mark where you want the rungs to be on the rails. 

Step 5:
Take your drill, the screws and the rungs and start to screw the first rung in. Repeat this step until all the rungs are screwed in on both sides. Once I finished this, I noticed the ladder was a bit too tall so I had my husband saw off a small portion of the bottom of each rail. 

Step 6:
Next, take your stain and do the first coat of stain (or paint). Let that dry and then do another coat if needed. Let the second coat dry. If you are happy with it, and once it is dry, you can start placing your throw blankets on it. (NOTE: I actually had to do four coats on stain for it to be almost opaque black). 

So that's how to make your very own blanket ladder. It is pretty time consuming but definitely worth it. I love how mine turned out! It looks so good in my living room and definitely helps in de-cluttering with the living room and the linen closet. I hope you enjoyed this post. Leave me pictures or a link to your blog post or video for me to check out! Until next time, Happy Crafting! xoxo

Wednesday, 28 January 2015

Valentine's Day with Brittany: Glitter Heart Canvas

Hi Everyone!

So I'm back and I'm kicking off my Valentine's day segment with this really easy and really affordable DIY for your home. It's a simple way to add a touch of Valentine's Day to your home that is subtle and looks great! All you need is a few things. This is stuff that you can find around your home or that you can get at the dollar store. Let's get started!

Things You Need:
-canvas (size doesn't matter - it's up to you!)
-paintbrush
-white paint
-pencil
-glitter in the colour of your choice (I went with red)
-white glue
-newspaper (or some sort of paper to help keep the glitter in check)
-a heart shape to trace (or you can draw one freehand if you are good at drawing hearts)
-sealer spray

Step 1:
The first thing you need to do is to prep your canvas. To do this, take your white paint and paint brush and just coat the canvas in a layer of the white paint. Put the canvas aside to dry.

Step 2:
While you are waiting, you can make your heart stencil. Just take a regular piece of paper. Fold it in half and then make half a heart shape. The two points need to meet the folded edge. Cut along the line you drew and unfold your heart. You can cut it more if you need to fix it.

Step 3:
Once your canvas is dry, take your heart stencil and place it on the canvas. If you need to, lightly put some tape on the back side of the stencil so it won't move around on you. Then lightly, trace around the heart shape. Once complete, take the stencil off the canvas carefully.

Step 4:
Now, take your clean paintbrush and your glue. Put about a quarter sized amount in the middle of your heart (the amount will depend on the size of your heart). Spread it around evenly, making sure to put glue on top of your pencil lines so they won't show. Be a little generous with the glue. If you put too little on, the glitter will not stick properly.

Step 5:
Once you have all the glue spread out evenly, take your glitter and shake a generous amount in the middle of the glue. (Do not worry - you won't be wasting it. You can dump it on a paper and put the excess back in the container afterwards). Carefully, spread the glitter around making sure that all the parts with glue are covered. (The easiest way I found to do this was to beat the bottom of the canvas gently, making the glitter jump around).

Step 6:
Once all the glue area is covered, dump the rest of the glitter onto a piece of paper and tap the backside of the canvas to get any loose glitter off. Then set the canvas aside to dry (This is where you can take the piece of paper and pour the excess back into the container).

Step 7:
Once the canvas has dried, take your sealer spray and spray the front of the glitter. This will lock in the glitter so that none can fall off and get all over the place. You may have some fall off but it won't be nearly as much as it would be if you didn't spray it. Set it aside to dry.

Once it has dried, you are now ready to use it to decorate your home! I hope that you enjoyed this little tutorial. Like I said, it is quick and easy and can be personalized to the individual. You don't have to do hearts. It is totally up to you! Until next time, Happy Crafting! xoxo

Monday, 12 January 2015

Deck the Halls with Brittany: Holi-DIY #3!

Hi Everyone,

I just wanted to come on and do one last post.... even if it is after Christmas... and New Years! I got so caught up in festive activities that I didn't have enough time to post this one before Christmas. This DIY is pretty easy to do and allows you to recycle those old Bath and Body Works candles you have that are cleaned out and laying around. Let's get started!

Things You Will Need
-repurposed BBW candle (de-potted and cleaned)
-glass candle stick holder (I got mine at Dollar Tree)
-crazy glue
-chalk board labels

Step 1:
Make sure the bottom of the candle jar and the top of the candle stick holder are clean. Then place the jar on top to make sure you get it centred. Think of this as measuring twice and "cutting" twice.

Step 2:
Once you have found the centre, carefully place crazy glue around the rim of the glass candle stick holder. Then place the candle jar on top, making sure you have placed it where the centre is.

Step 3:
Let dry. You may have to wait a while. You can also carefully weigh it down. I did this by placing single wick candles from Bath and Body Works inside the jar. I typically wait overnight.

Step 4:
Once the glue is dry, or the next day, take the jars and place a chalkboard label on the side where you want it to be. You can leave it blank or you can write whatever you like on it.

I hope you enjoyed this post. You can do this with a bunch of different clear vases to make your own different apothecary jars, instead of spending insane amounts of money on store-bought ones. I love doing this project. It took hardly any time at all and I made a couple of amazing gifts for a couple of my cousins. Be sure to post pictures in the comments showing me your DIY apothecary jars! Until next time, Happy Crafting!

Wednesday, 24 December 2014

Deck the Halls with Brittany: Holi-DIY #2

Hi Everyone!

Merry Christmas Eve! I hope everyone is having a great day today, despite the dreary weather. Today, I'm coming at you with a simple little project that you can do if you are looking for a last minute gift or if you need to add a little Christmas to a corner in your house. Today, we are making a little Christmas/winter scene placed in a lantern. Let's get started!

Things You Will Need:
-glue gun
-glue gun sticks
-mini lantern (can buy at Dollarama - had mine from my Spring wedding)
-mini Christmas village figurines and trees (Dollar stores and Walmart)
-fake Christmas snow

Step 1:
Make sure you take all stickers and tags off all the things (if you needed to buy them). Make sure things are clean.

Step 2:
Open up the lantern and place your figurines and trees into the lantern to get a sense of where you want things placed. Once you have settled on placement, plug your glue gun in and wait for it to heat up.

Step 3:
Once the glue gun is ready, start gluing your figurines and trees in. I had to place mine on top of the rim for the tea light candle. Once you have everything glued into place, take your bag of fake snow and carefully sprinkle it into the lantern. If you have a little tea light holder in your lantern, be sure to put enough snow in it to completely cover that up. Once you have done that, your little craft is complete.

As you can tell, this craft is super simple. I made four of these before my Christmas party to give as an extra little gift to my girlfriends. It's also a nice little craft to make with some older kids. You may need to handle the glue gun though. If you had a bigger lantern and wanted to get more crafty with it, you could put those bigger houses in it to get it to light up and you could make a whole scene. It is entirely up to you. Anyway, I hope that you all enjoyed this quick little craft post. It's been awhile since I posted on here so I figured I would post a few little things. Until next time, Happy Crafting! xo

Thursday, 20 November 2014

Deck the Halls with Brittany: Holi-DIY #1

Hi Everyone!

So today I have decided I'm going to kick off my new series of Holiday posts. It will be purely Christmas related as I live in Canada and have already celebrated Thanksgiving. If you are looking for Fall DIY's then please look at my I Love Fall series.

Today's Holi-DIY is going to be very simple and is not time consuming at all. You can even do this with kids at home or in a classroom. Let's get into it, shall we?

Things You Will Need:
-old picture frame
-Christmas themed paper
-ornament(s)
-glue gun
-glue gun sticks


Step 1:
Take your Christmas themed paper and the back of the frame and trace around the back of the frame. Cut out what you have traced. Remember to cut inside the lines to make sure that the paper will fit in the frame.

Step 2:
Once the paper is cut out, place it in the frame and put the backing back on and secure it shut. Turn the frame around so you can see the paper you just placed in there.

Step 3:
Plug in your hot glue gun. While you are waiting for it to heat up, decide which ornaments you would like to place on the paper. I decided to keep it simple and only put one ornament but you could get creative with it and do more than one. It's entirely up to you.

Step 4:
Once you have decided, take your glue gun and carefully place glue on the back of the ornaments. Remember, try not to wait too long because hot glue dries quickly. Stick the ornament onto the paper. Keep doing this step until your frame is how you like it.

Step 5:
Once you have finished gluing the ornaments onto the paper, place it somewhere in your house or apartment to add some festive cheer!

So that was a very easy DIY for Christmas decor. I found similar things on Pinterest and Youtube so you can look there for more ideas of what to do with different ornaments. I hope you have fun doing this little project. Be sure to leave me pictures in the comments section. I would love to see what you all come up with! Until next time, Happy Crafting! xoxo